Your calendar and your billing system should be best friends. In TimeNet Law 6, they finally are.
2-Way Calendar Sync connects Apple Calendar with TimeNet Law so your events appear in Launchpad's Day, Week, and Month views. See your meetings alongside your time entries. Click a calendar event to turn it into a billing entry with the client and matter pre-filled. Push TimeNet Law entries back to Apple Calendar so your schedule is always complete. All of it happens in real time.
Setting It Up
Getting calendar sync running takes about 30 seconds. Here's the setup:
Open Calendar Settings
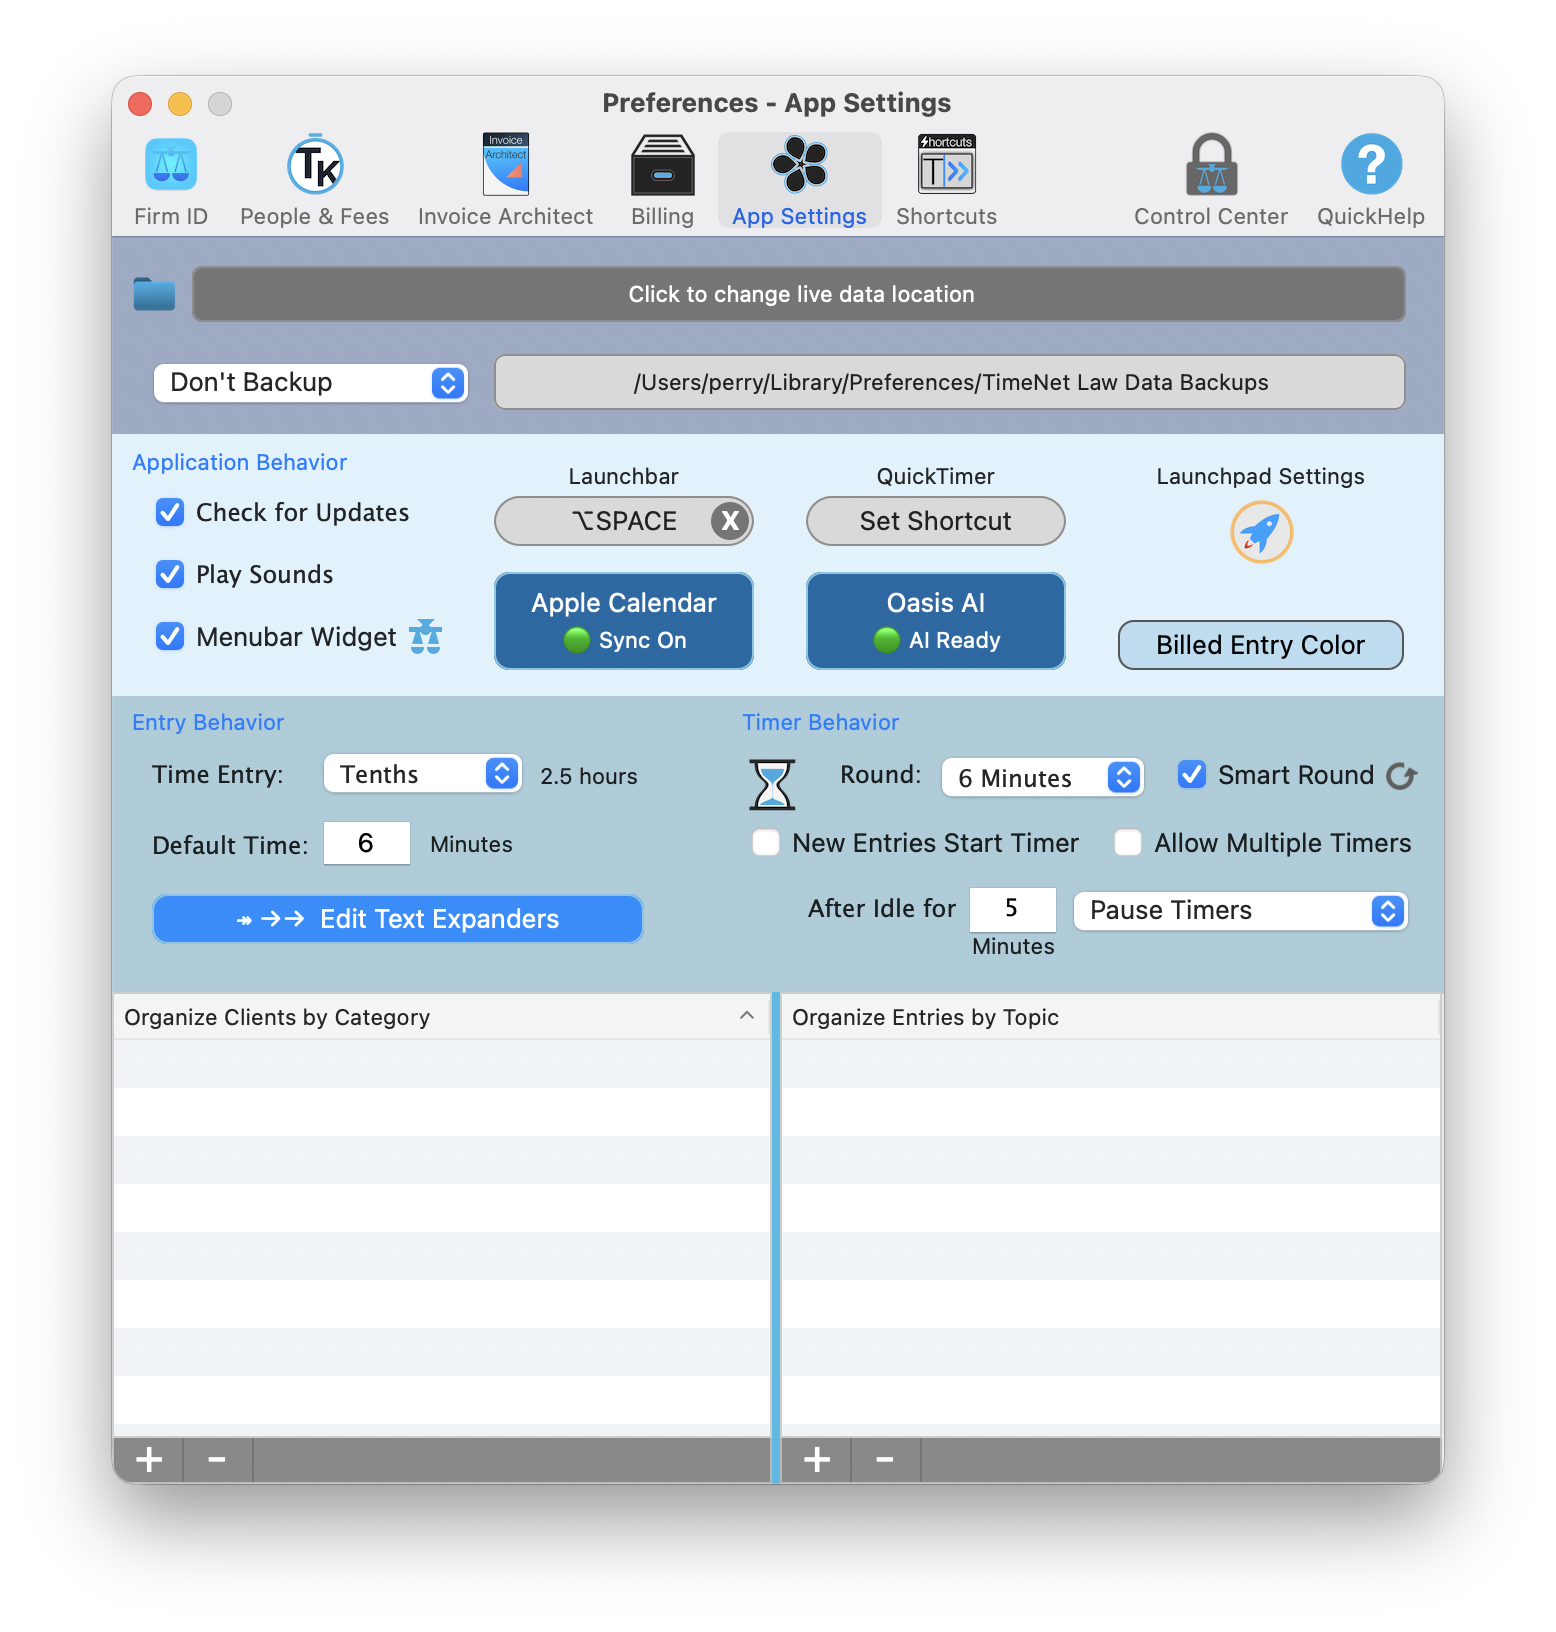
Go to Preferences → App Settings and click the blue Apple Calendar button.
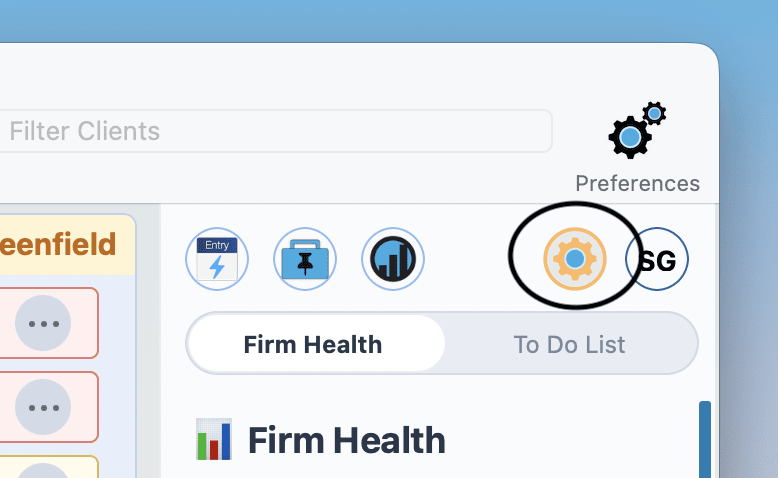
You can also get here by clicking the Launchpad Settings button at the top-right of your Launchpad sidebar.
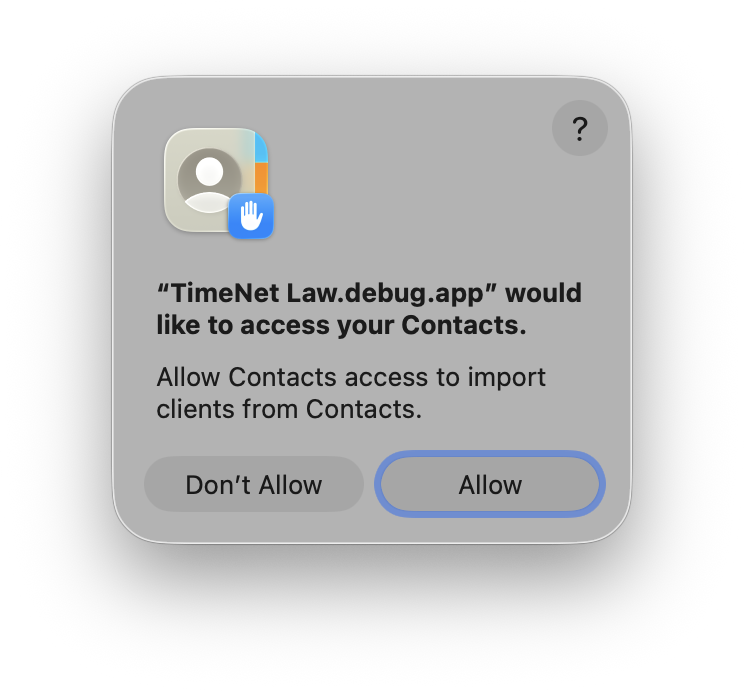
Grant Calendar Access
If this is your first time, macOS will ask you to allow TimeNet Law access to your calendars. Click Allow. This is a standard macOS permission — your data stays on your Mac.
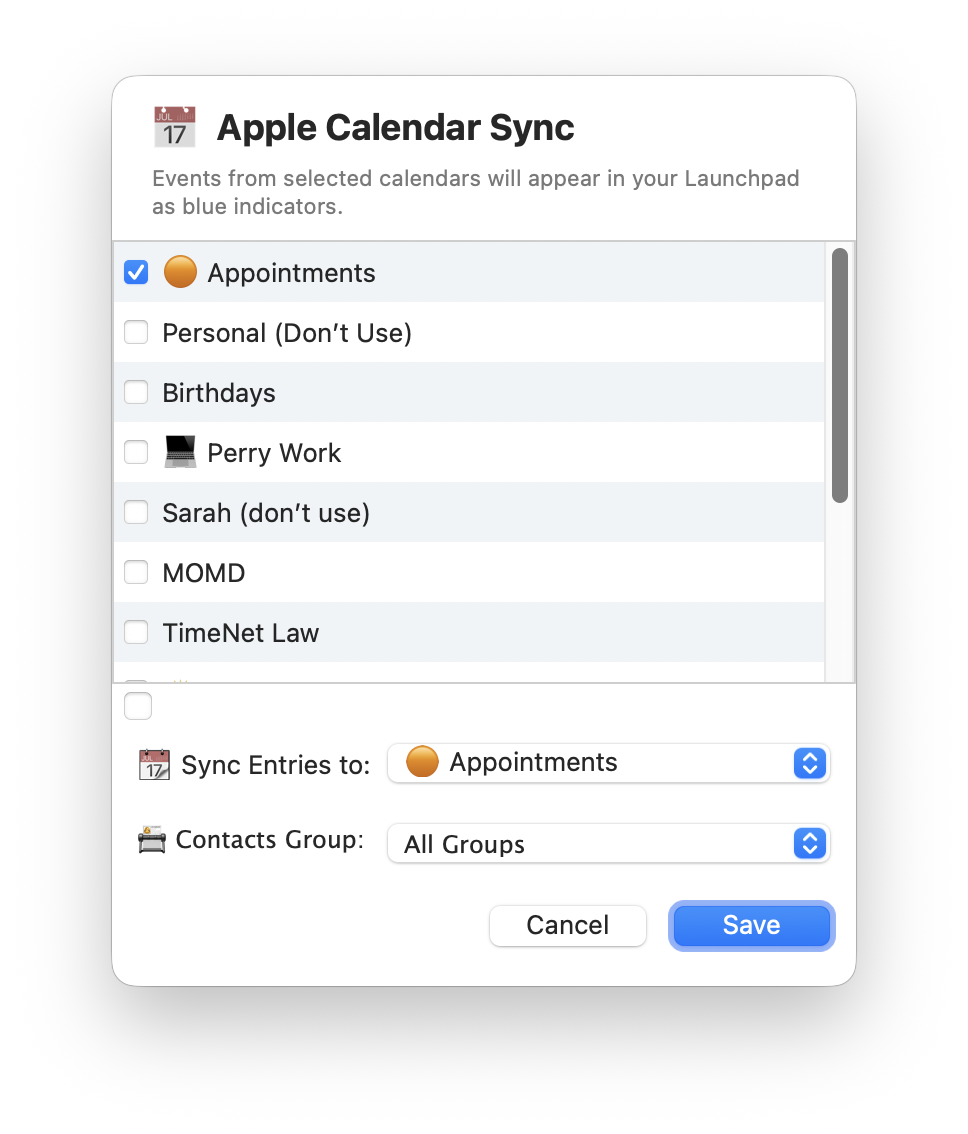
Select Calendars and Save
The Apple Calendar Sync window shows all your calendars. Check the ones you want to display in Launchpad — work, personal, shared calendars, whatever you need.
Use the Sync Entries to popup at the bottom to choose which calendar TimeNet Law entries should sync to when you push them to Apple Calendar.
Click Save. That's it — syncing is real-time and live.
Enabling calendar sync displays your Apple Calendar events on Launchpad — it does not automatically create billing entries from them. You stay in control. Events are visible on your timeline so you can see your full schedule, and you decide which ones become billing entries.
Apple Calendar → TimeNet Law
Once sync is enabled, your Apple Calendar events appear automatically in Launchpad's Day, Week, and Month views. No copy-pasting, no manual entry. They just show up, in real time.
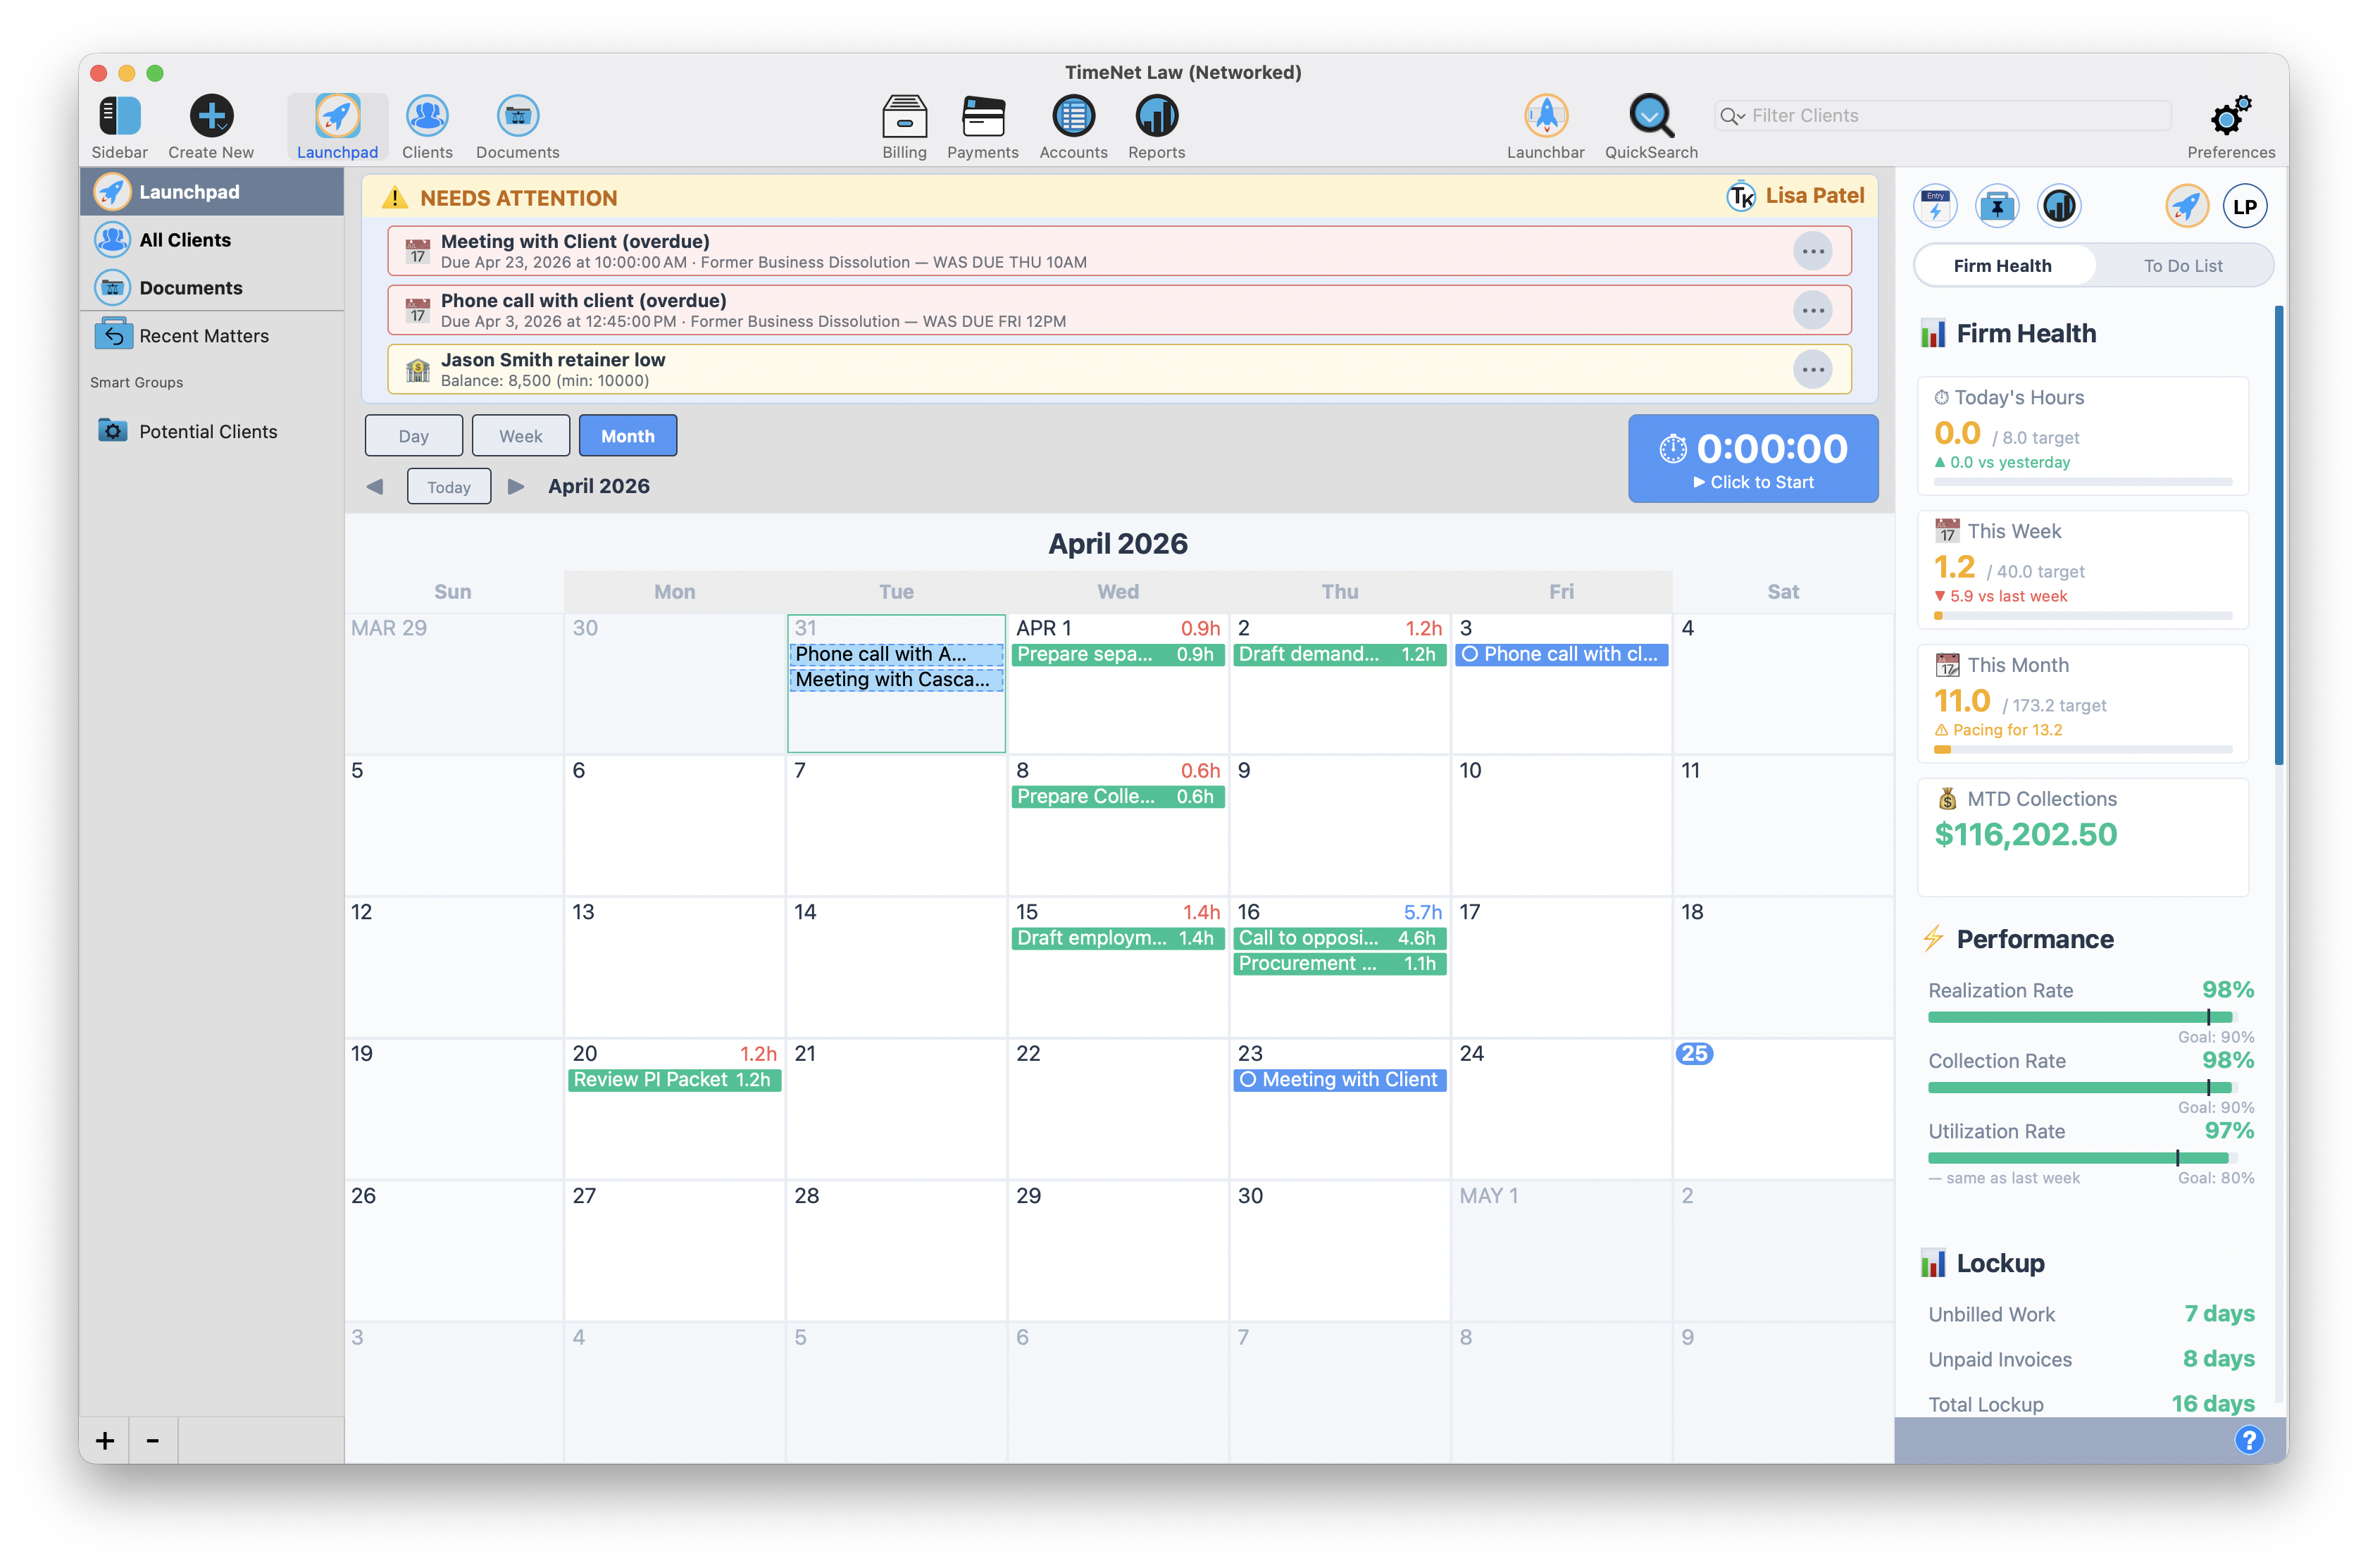
How Events Appear in Launchpad
Calendar events appear alongside your regular time entries in all three Launchpad views. They're visually distinct so you can tell at a glance what's a billing entry and what's a calendar event.
Converting Events to Billing Entries
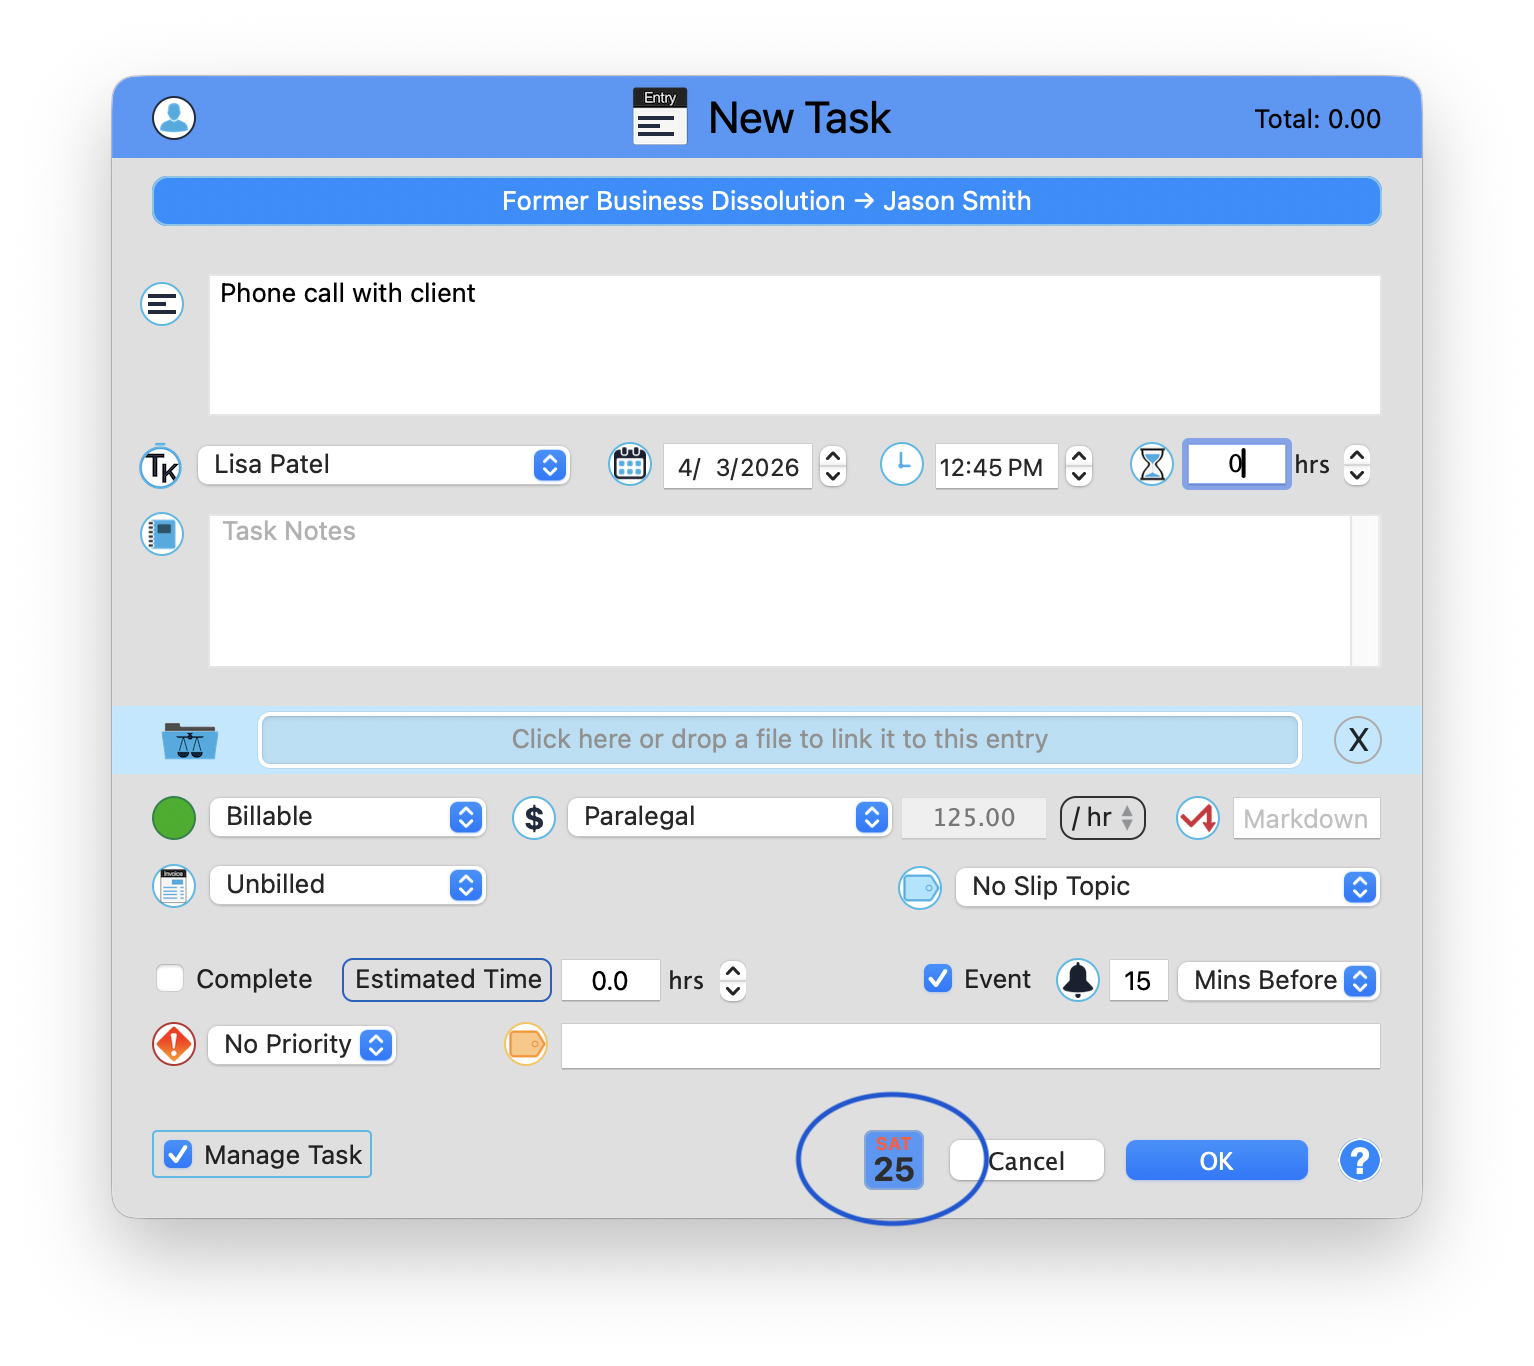
See a meeting on your calendar that should be billed? Click it. TimeNet Law opens a new entry form with the details pre-filled — description, date, time, and duration all pulled from the calendar event. It even uses Automatic Matter Match to figure out which client and matter the event belongs to based on the event title.
Click a calendar event → TimeNet Law matches the client and matter automatically
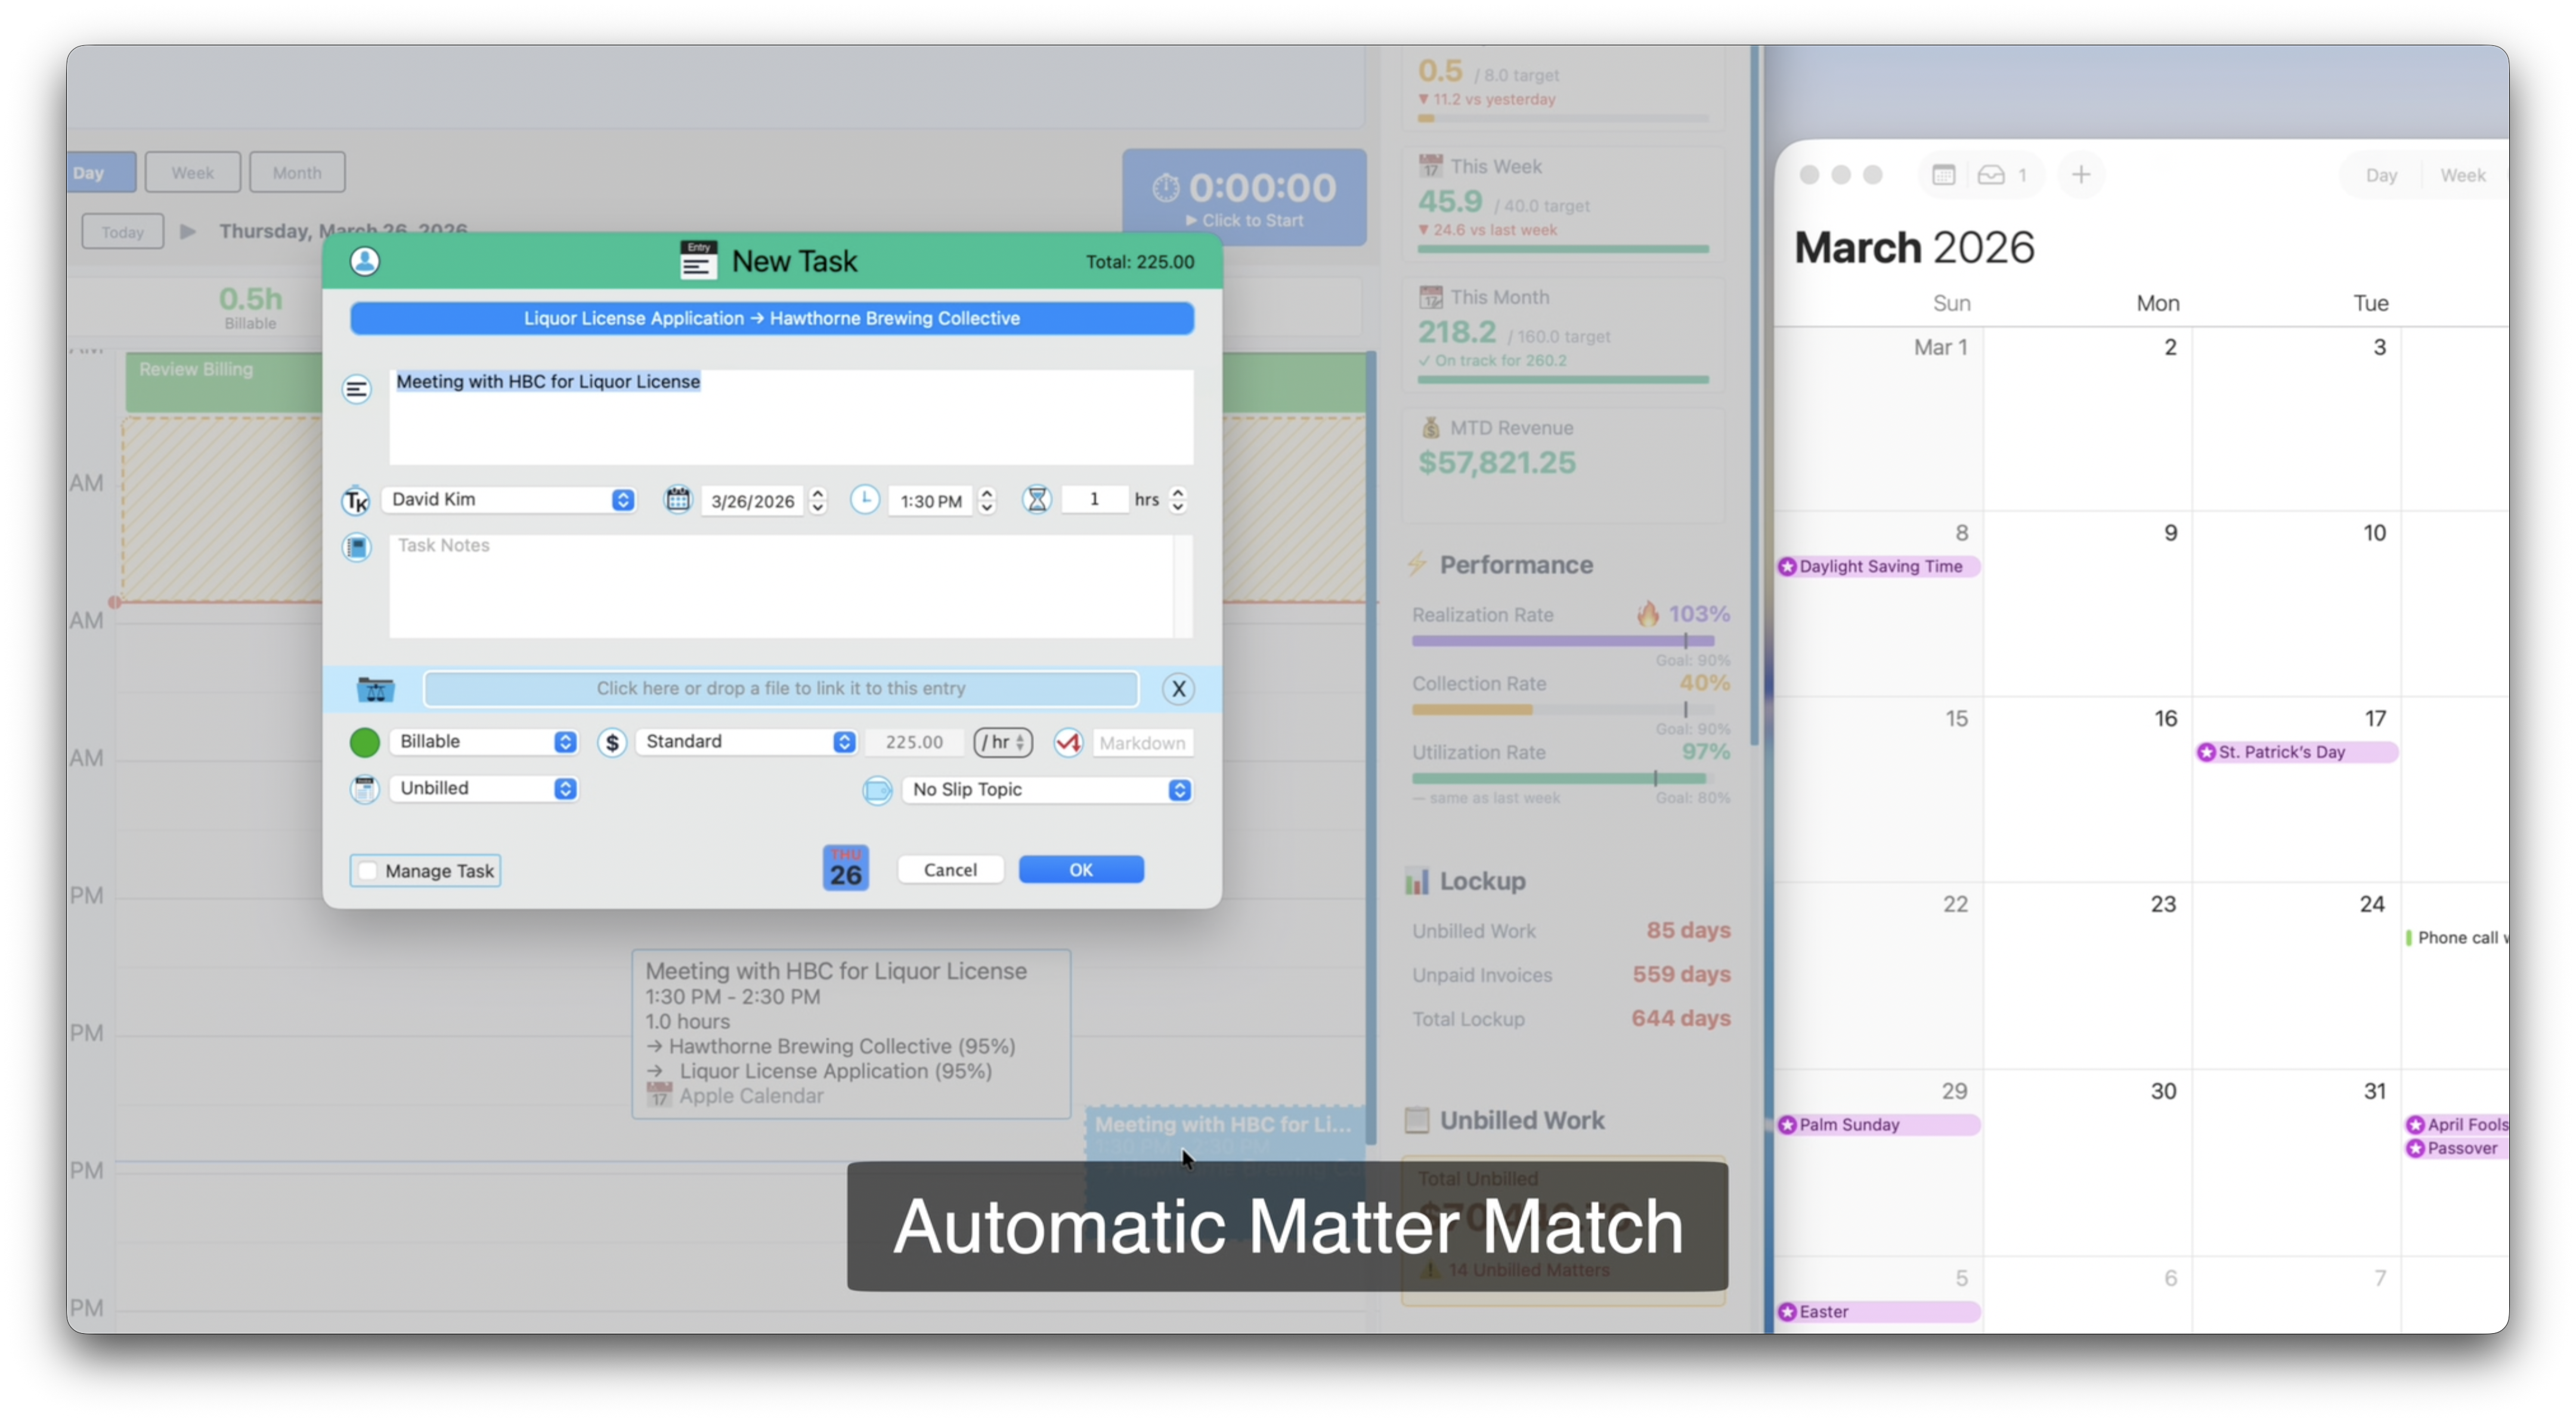
The Automatic Matter Match feature gets smarter the more descriptive your calendar events are. "Meeting with HBC for Liquor License" matches perfectly. "Meeting" by itself won't. Use client or matter names in your calendar event titles for best results.
TimeNet Law → Apple Calendar
The sync runs both ways. You can push any TimeNet Law entry, event, or task to Apple Calendar so your schedule is complete everywhere — on your iPhone, Apple Watch, and any shared calendar views.
To sync an item to Apple Calendar, open the entry and click the Sync to Apple Calendar button at the bottom of the form, next to the OK button. It's a per-item decision — you choose what goes to your calendar and what stays in TimeNet Law only.
Synced entries appear in the calendar you selected in the "Sync Entries to" popup during setup. Because Apple Calendar syncs across your devices via iCloud, anything you push from TimeNet Law shows up on your iPhone and Apple Watch automatically.
This is great for blocking off time on your calendar when you know you'll be deep in a case. Create an entry in TimeNet Law, sync it to Apple Calendar, and your colleagues see that you're busy — without you ever leaving your billing tool.
Working with Calendar Events
Calendar events and billing entries coexist peacefully on your Launchpad timeline. Here's how to think about them:
- Calendar events from Apple Calendar are displayed on your Launchpad views so you can see your full schedule in one place
- Billing entries are your TimeNet Law time entries — the work you've logged and billed
- They live side by side. You can see at a glance where your time went and where your day is headed
- When you're ready, click any calendar event to convert it into a billing entry. Nothing happens automatically — you're always in control
As you create entries in TimeNet Law, you decide whether each one should appear on Apple Calendar or stay within TimeNet Law only. There's no complicated sync rules to configure. It's simple by design.
iOS Calendar Sync
On iPhone and iPad, calendar sync extends to mobile seamlessly.
- Events from your synced calendars appear in the iOS companion app's views
- Convert events to entries on mobile with the same flow
- iCloud Calendar changes sync to TimeNet Law through Apple's calendar infrastructure
Because Apple Calendar already syncs across your devices via iCloud, TimeNet Law on your Mac effectively keeps your iPhone's calendar in sync too. No additional setup needed on iOS — it just works through Apple's ecosystem.
Troubleshooting
Calendar events aren't appearing in Launchpad
- Open System Settings → Privacy & Security → Calendars and make sure TimeNet Law is enabled
- In the Apple Calendar Sync settings, verify the right calendars are checked
- Restart TimeNet Law — calendar permissions sometimes require a restart to take effect
Permission dialog never appeared
- Go to System Settings → Privacy & Security → Calendars
- If TimeNet Law isn't listed, try toggling the Apple Calendar button off and on again in Preferences → App Settings
- If it still doesn't appear, check System Settings → Privacy & Security → Full Disk Access — some macOS configurations require this
"Sync Entries to" calendar isn't available
- Make sure the calendar you want to sync to is checked in the list above
- Read-only calendars (like subscribed calendars or some shared calendars) can't receive entries — choose a calendar you own
Your Calendar Is Now Your Billing Tool
Stop living in two worlds. Your calendar events and your billing entries belong together. 2-Way Calendar Sync makes them one unified view in Launchpad, converts events to entries with one click, and makes sure you never miss a billable moment hiding between meetings.
Your calendar is now your billing tool.
Related Tutorials
- Launchpad — Where synced events appear and come to life
- iOS App — Calendar sync on your iPhone and iPad
- Cloud Sync — Syncing your TimeNet Law data across all your devices
Calendar Sync Not Behaving? Perry Can Help.
Calendar permissions on macOS can be tricky. If sync isn't working, Perry will walk you through it personally.